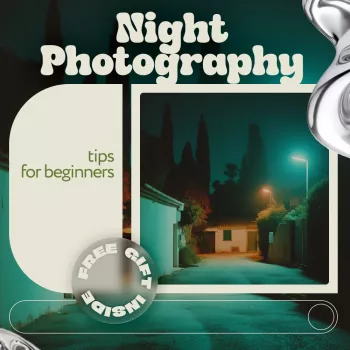
Night scenes can look dramatic and clean when the camera is set up for low light: stable support, deliberate exposure choices, and a simple workflow that prevents blur and noise. This step-by-step guide breaks down the essentials—what to bring, how to focus in the dark, starter settings that work, and a few creative long-exposure ideas that are beginner-friendly. For more guidance, see 10 Tips for Wonderful Low Light Photography Without Flash.
A successful night shoot is usually decided before the first frame. Start with stability: use a tripod whenever shutter speeds drop below what can be handheld, and keep the center column low (fully extending it can make the setup wobble). To avoid the tiny shake that happens when pressing the shutter button, use a remote release or set a 2-second timer.
Pack a small flashlight or headlamp for changing settings, checking your footing, and even lighting a foreground detail. A lens hood helps reduce flare from streetlights and headlights. Finally, shoot RAW so you can recover shadow detail, dial in white balance precisely, and manage noise with more control.
If you want a compact reference you can keep on your phone while shooting, the Night Photography Tips for Beginners – Step-by-Step Ebook Guide to Low Light Photography, Camera Settings, Long Exposure & Creative Night Shots is an easy way to keep a consistent checklist for settings, focus, and long-exposure ideas.
Begin where light already exists: city streets, bridges, illuminated buildings, gas stations, or a single well-lit subject against a darker background. These scenes give your camera something to “work with” and make exposure decisions simpler.
Look for straightforward structure—leading lines like roads, railings, or skylines—and reflections on wet pavement or water. When possible, avoid heavy mixed lighting at first (neon plus sodium vapor plus LEDs), since it can create strange color casts that take time to correct. Arriving during blue hour helps you set up safely and refine composition before it gets truly dark.
Autofocus often struggles at night, so use it strategically. Aim AF at a bright edge or high-contrast detail (a street sign, lit window frame, or sharp building outline), lock focus, then switch to manual focus so the camera doesn’t hunt on the next shot.
If your camera offers live view magnification, zoom in on a bright detail and manually fine-tune until edges look crisp. For cityscapes, focusing about one-third into the scene or on a mid-distance building is a reliable approach. For stars, focus near infinity, but confirm with magnification—many lenses can focus slightly past infinity, which will soften the image. Once focus is set, avoid touching the focus ring between frames.
Set your camera to Manual exposure to keep results consistent when bright lights and deep shadows share the frame. On a tripod, start with ISO 100–400 and choose aperture based on your goal: f/2–f/2.8 to gather more light and isolate a subject, or f/5.6–f/11 for deeper sharpness in cityscapes.
| Scene | Aperture | ISO | Shutter | Notes |
|---|---|---|---|---|
| City skyline (still) | f/8 | 100 | 5–20s | Sharpness and clean noise; adjust shutter for brightness |
| Street scene with some motion | f/5.6 | 200 | 1–6s | Cars/pedestrians may blur; stabilize camera and watch highlights |
| Light trails (traffic) | f/8 | 100 | 10–30s | Time exposures with steady traffic; avoid clipping lamps |
| Handheld night portrait (available light) | f/1.8–f/2.8 | 1600–6400 | 1/125–1/250 | Prioritize shutter speed; accept higher noise |
| Night sky (basic stars) | f/2–f/2.8 | 1600–3200 | 10–20s | Keep shutter shorter to reduce star trails; fine-focus near infinity |
For a quick refresher on how aperture, shutter speed, and ISO work together, Photography Life’s exposure guide is a clear reference.
If available, use electronic front-curtain shutter or mirror lock-up to reduce vibration, especially with longer focal lengths. In-camera long exposure noise reduction can help with single, very long exposures, but remember it doubles capture time because the camera records a second “dark frame.” DPReview’s overview of long exposure noise reduction explains when it’s useful.
For comfort on colder shoots (which can also help patience and steadier technique), a warm accessory like the Gold Glitter Scarf is a simple add-on to your bag.
Start in Manual and RAW at ISO 100–400, f/5.6–f/11 for most cityscapes, and a shutter speed around 5–20 seconds. Then adjust shutter speed for brightness while watching the histogram to protect highlight detail in streetlights.
Autofocus on a bright edge or high-contrast detail, then switch to manual focus to lock it in. Use live-view magnification to fine-tune focus, and recheck after reframing so you don’t accidentally soften the scene.
Blur often comes from small vibrations: pressing the shutter without a timer/remote, wind shake, a raised center column, a loose tripod head, or stabilization left on when it should be off. It can also be caused by shutter shock or accidentally nudging the focus ring between frames.





Leave a comment